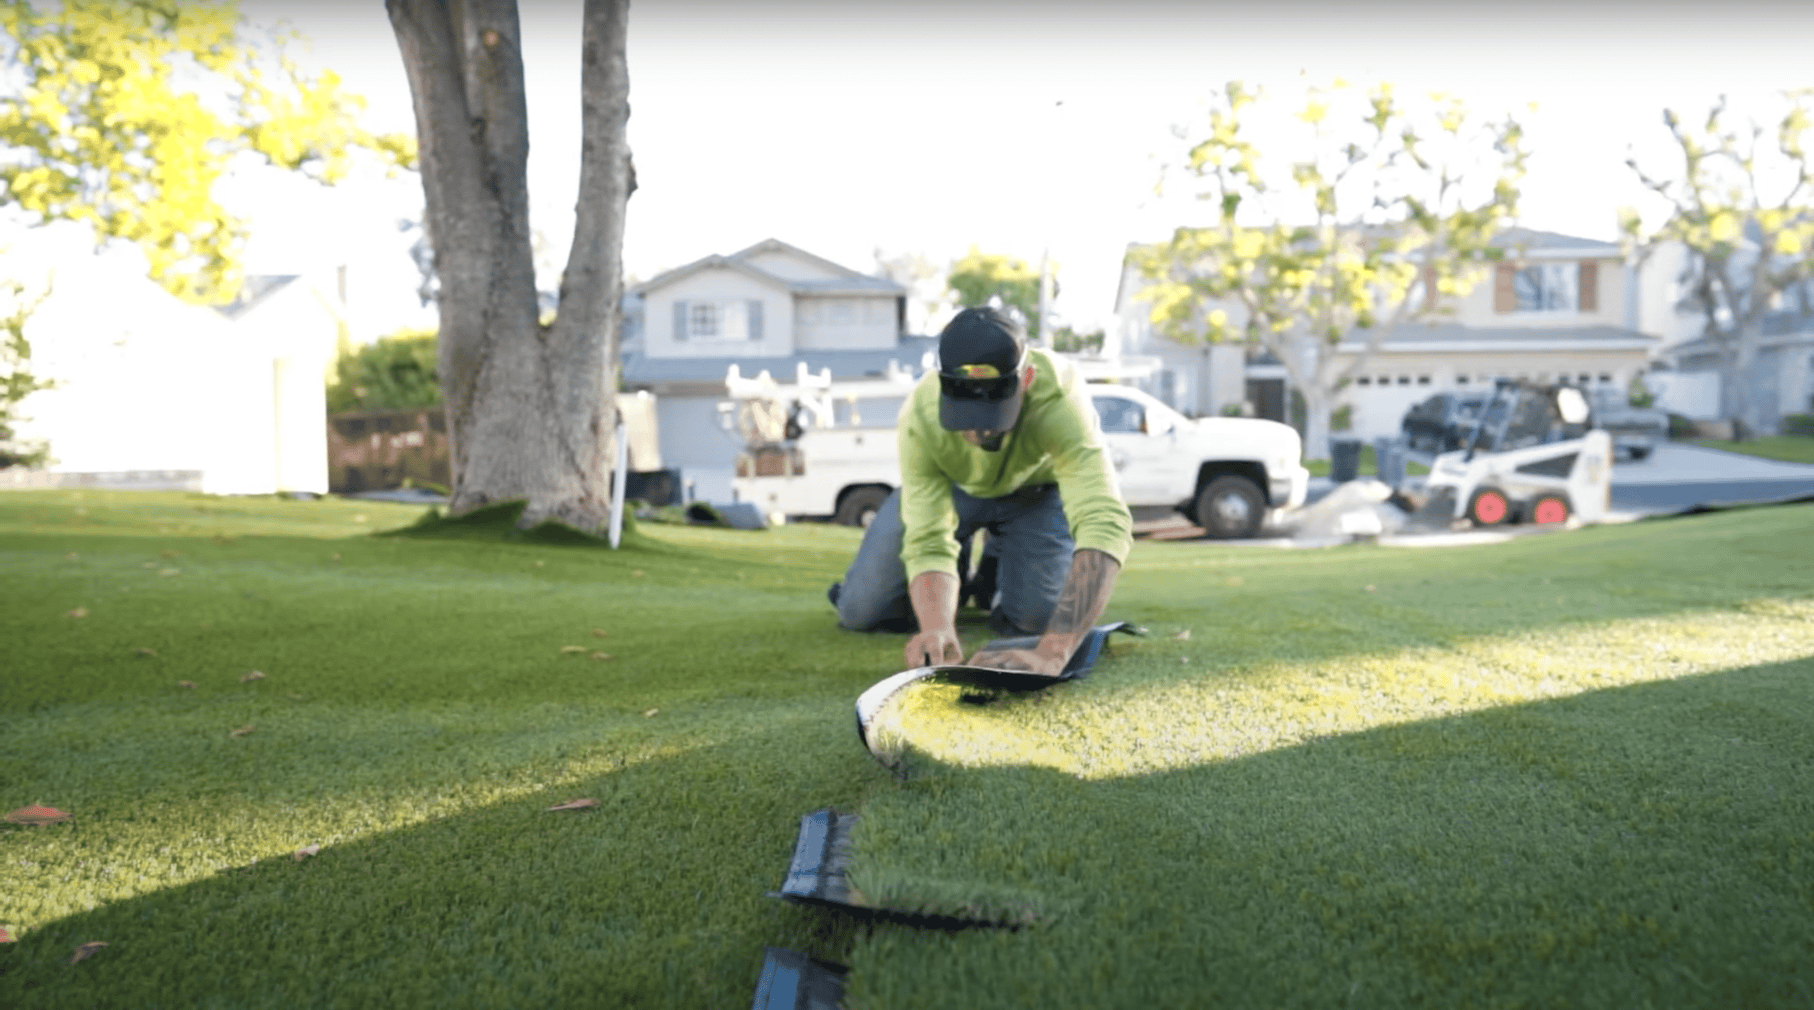
Seam lines are the most recognizable issue with artificial grass installation. These lines are the place where one piece of synthetic turf connects to another. The key to the proper installation is making sure that seam lines are invisible.
When you can see the seam line, the turf appears unnatural. Meanwhile, visible seams could turn into an integrity issue. Improper artificial grass seaming could cause the turf to shift and become a slipping hazard.
Preventing visible seams in your artificial turf is complicated but not impossible. Let's take a closer look at battling visible seam lines on your synthetic grass surface.
1. Avoid the Mohawk Effect
The Mohawk effect occurs when synthetic turf fibers along the edge of one connected piece cross with the fibers at the edge of the second connected piece. This creates a line of dense grass that becomes highly visible and makes your artificial turf look unnatural.
Two ways to avoid the mohawk effect are:
Pay Attention to the Gauge
When you look at your artificial turf, you can see that rows of fibers are stitched to the backing. The distance between these rows is called gauge. The common gauge is ¾ inch, 3/8 inch, or 3/16 inch.
To prevent the mohawk from occurring, you need to make sure that the gauge remains the same even when you join two pieces together.
For example, if the gauge on your turf is ¾ inch, and the distance between the last row of fibers and the edge of one piece is ½ inch, you need to make sure that the distance between the last row of fibers and the edge of another piece is ¼. When you put them together, the gauge will become the perfect ¾ inch, and you won't see the Mohawk effect.
Eliminate the Selvedge
When you buy a piece of artificial turf, there is usually a strip at the edge of the roll that doesn't have fibers on it. It means that the backing of the turf extends past the piles and creates a selvedge. The first three rows of fibers tend to slant toward the edge and cause the Mohawk effect. To avoid it, you would have to cut the piece of turf past the first three rows of fibers.
Pro tip: If you make S-shaped seams, they are less likely to cause a Mohawk effect than straight cuts. Consider using the turf seam tool to cut your artificial turf.
2. Align the Turf's Pile Direction
The pile is the grass blade on your piece of artificial turf. If you take a close look at the surface, you will see that the blades lean slightly in a certain direction. The pile direction is the direction the grass fibers are leaning toward.
Before connecting two pieces of artificial turf, you need to make sure that the blades are leaning in the same direction. If they lean in opposite directions, the seam becomes visible, making your synthetic lawn look artificial.
Ideally, you should connect two pieces of turf from the same roll. If it's not possible, pay extra attention to gauge and pile direction.
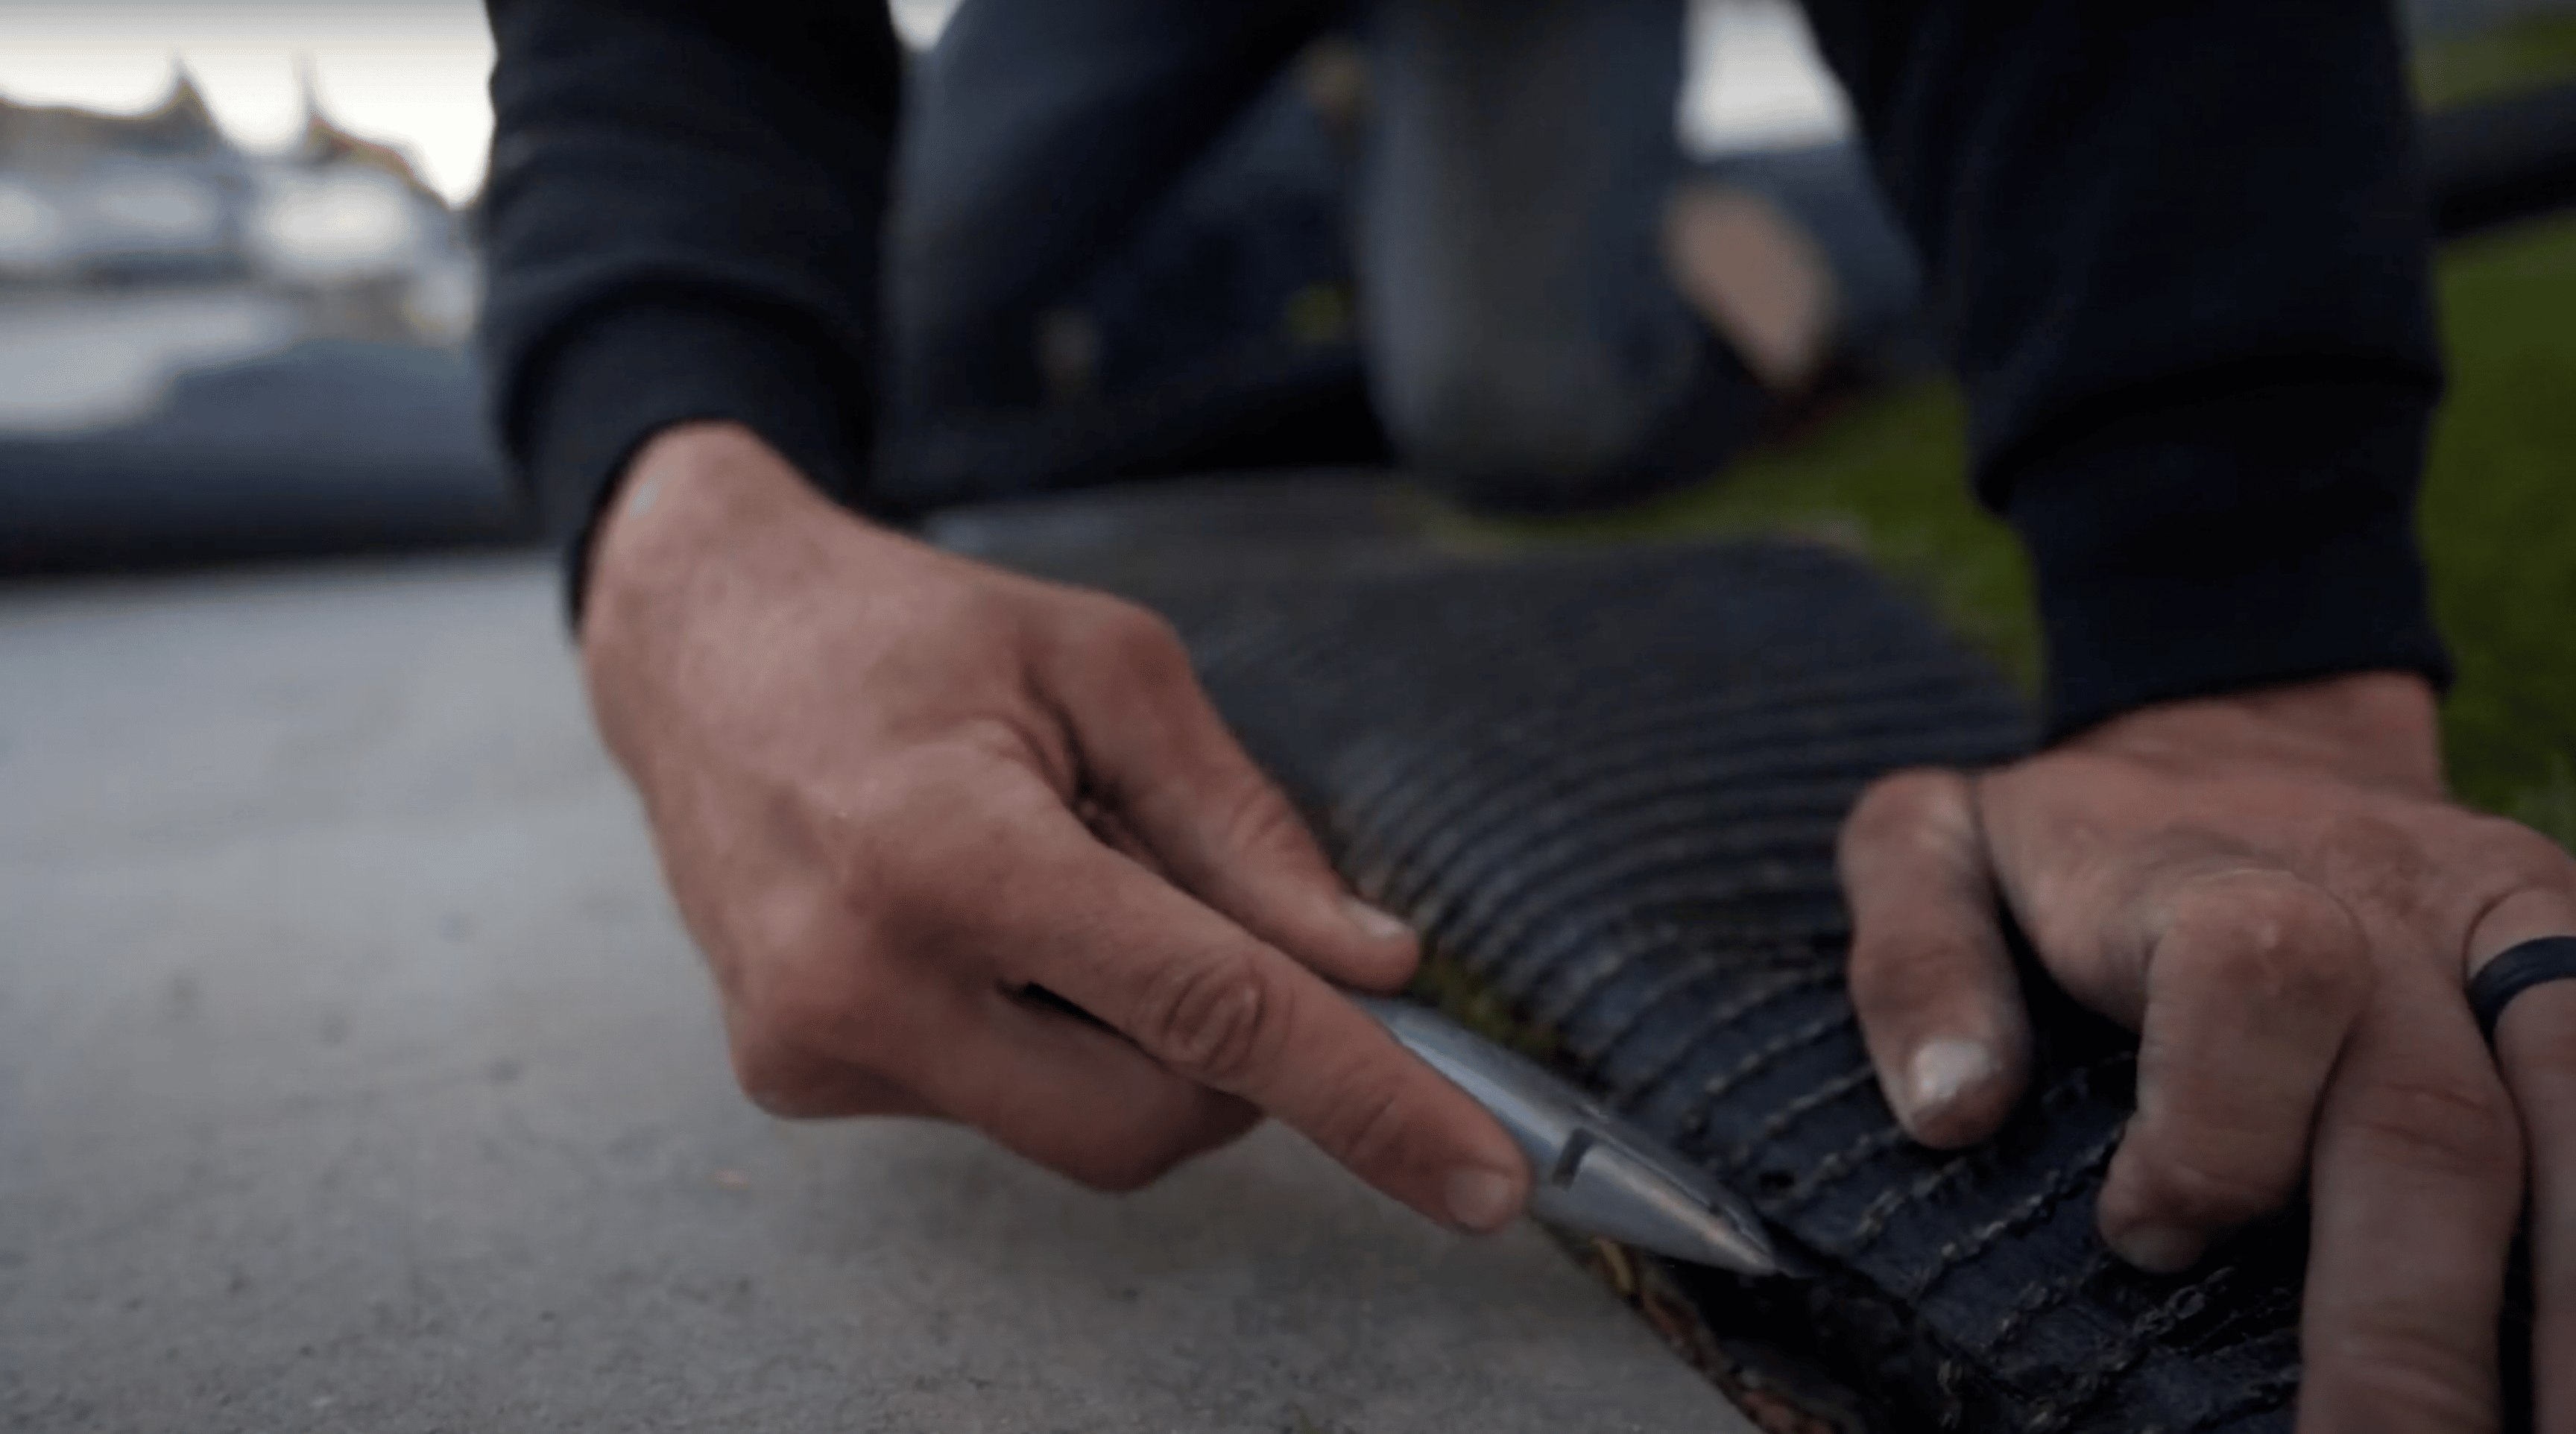
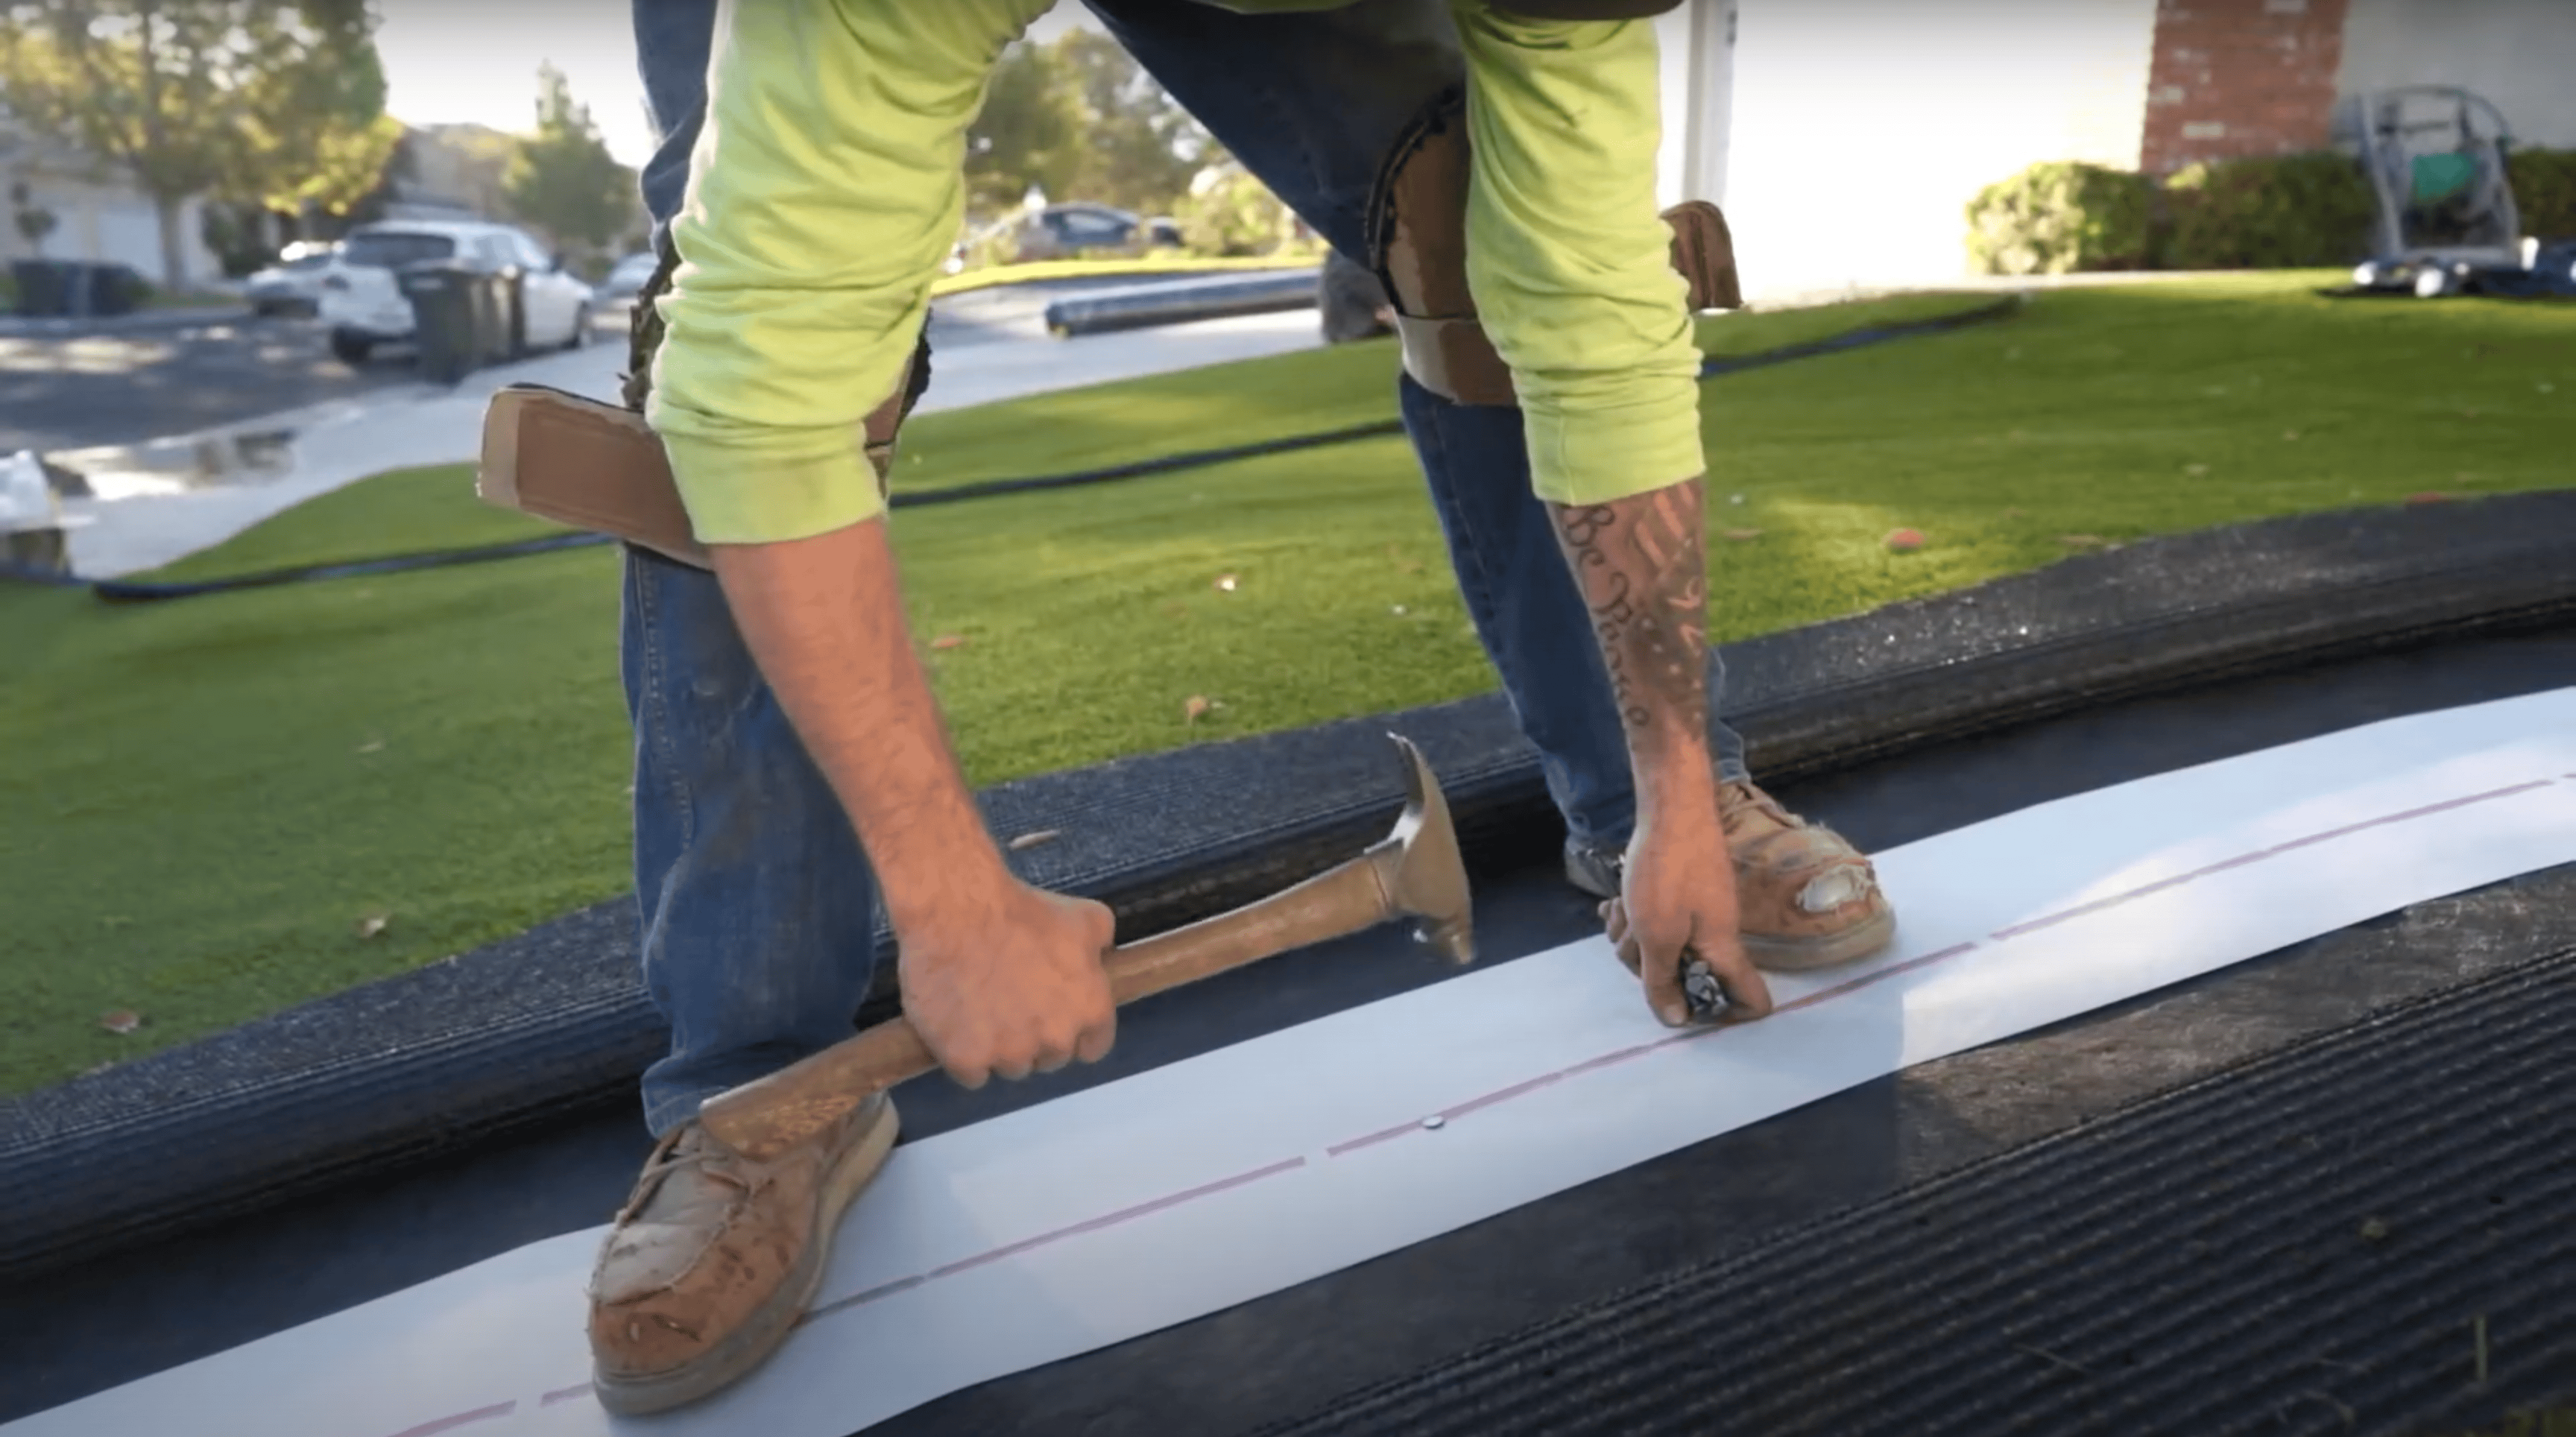
3. Combine Nails and Turf Adhesive
Tea or coffee? Paper or plastic? Nails or glue? When it comes to keeping artificial turf in place, experts often disagree on the method. While nails are a quick and easy way to keep the turf together, they may come loose and become a hazard. Meanwhile, tape and glue can do a better job of keeping the turf secure and creating a natural seamless appearance.
In reality, the combination of non-galvanized 40-D 5-inch turf nails and turf glue is the best option. For putting greens with short pile heights, you would need to use shorter nails.
To take advantage of the combination:
-
Use the nails to secure the seam tape
-
Apply turf adhesive to the seam tape
-
Lay the two pieces of turf carefully on top of the tape
When you secure the joins with turf glue, pay attention to the artificial grass pile direction. Try to fit the pieces as closely as possible without disrupting the gauge.
4. Stay Away From 90-Degree Seams
Some property owners choose to create 90-degree seams in artificial turf because it allows them to utilize more pieces of artificial grass. A 90-degree seem involves placing two pieces of grass next to each other so their stitches (places where fibers are stitched to the base) are perpendicular.
When you do this, piles end up pointing in different directions. Meanwhile, you disrupt the gauge and risk seeing the Mohawk effect. While it may seem convenient, 90-degree seams cause your artificial grass surface to appear unnatural.
Even if you have to work around obstacles to install artificial grass, try to avoid disrupting the gauge and ignoring the pile direction. Eventually, you can get visible seams that may make your lawn or field look more like a patchwork quilt than a natural surface.
5. Maintain Your Synthetic Grass
Synthetic turf doesn't require complex maintenance. However, if you ignore artificial grass maintenance tactics, you could reduce the lifespan of your artificial grass may create visible seams.
When installing your turf, you need to take advantage of the infill. Infill is an integral part of comprehensive artificial grass installation.
Infill can be made of silica sand, rubber, thermoplastic elastomers (TPE), or EPDM (synthetic rubber) that you put between grass blades keeps the pile upright even when there is heavy traffic. There are also infills created specifically to deal with pet waste such as ZeoFill, DuraFill, or Cool-Pet Specialty Blend.
Artificial grass infill reduces the contraction and expansion of the grass to increase its longevity. If you don't use infill, the grass may tear away from the lawn, and the seams can become visible
You should also cross-brush the grass regularly to maintain fluffiness and prevent matting. To achieve top results, you need to brush the grass against the direction of the blades.
6. Weight the Seams
After you glue pieces of artificial turf to the seam tape, you need to weigh the seam to make sure the pieces stick well to the adhesive, tape, and surface. You can use full infill bags to do it. Applying such pressure to the freshly-glued turf allows it to stay in place and streamlines the curing process.
Ideally, you should apply weight for 24 hours to make sure the adhesive is fully dry. While the turf may look fixed and ready to use from the outside in just a few hours, using it too quickly could cause the grass to move and create visible seams.
7. Use Professional Artificial Grass Installers
While seaming artificial grass may look straightforward on video, it rarely is. The installation process comes with a variety of nuances. Missing just one could cause visible seams and create an unnatural appearance.
If you've never learned how to seam artificial turf professionally, you are likely to make mistakes. Installation errors usually affect the integrity of the turf and lead to extra expenses.
If you choose to work with best-in-class installers, they don't just make sure that you have a beautiful-looking grass surface. They also provide a multi-year seamless installation guarantee. That's in addition to the product warranty that can last up to 16 years.
Professional installers can install 500 square feet of artificial turf in a single day. Even with the right tools, DIY efforts take much longer.
How much does it cost to fix visible seam lines in artificial grass?
If you choose professional installation, hiding seam lines can be free for the duration of the installation warranty. Make sure that the installers you work with offer a seamless installation guarantee.
If you install the grass yourself or work with average installers, the appearance of visible seams could mean damage to the base material. In that case, you would need to remove the turf and install it all over again.